Saturday, July 27, 2013

Flourless Chocolate Chip Chickpea Blondies


Do you all remember when I was talking about making a list of healthy meals that taste really good too?  Unfortunately, that list is still pretty short, especially in the dessert area.  But I have found a great new addition!  A few weeks ago I found Monique’s wonderful blog, Ambitious Kitchen, and instantly fell in love with several of her recipes.  One that especially caught my eye was the Flourless Chocolate Chip Chickpea Blondies.  They seemed exciting, new, and a bit intimidating.  But they have chocolate chips in them, so they can’t be too overwhelming, right?  Right?

Well, I was right! These bars are vegan and gluten-free, but don’t let that scare you off.  They are super easy and delicious.  I doubled the recipe for a 9 x 13 pan. 

Flourless Chocolate Chip Chickpea Blondies 
1 can (15 oz) chickpeas, rinsed and drained
1/2 cup all natural peanut butter, or another nut butter of your choice
1/3 cup pure maple syrup, agave nectar, or honey
2 teaspoons vanilla
1/2 tspspoon salt
1/4 teaspoon baking powder
1/4 teaspoon baking soda
1/3 cup vegan (or regular) chocolate chips
Sea salt, for sprinkling

1. Use a food processor or blender to blend the chickpeas into a smooth paste.  (If you use a blender, add the maple syrup in right away to help speed up this process.  You may also need to add a bit of water.)

2.  Stir the peanut butter, maple syrup, vanilla, salt, baking powder and baking soda into the chickpea paste.  Gently fold in the chocolate chips.

The batter will be rather thick and sticky, so you may want to take precautions and grease your spoon for easier clean up.  Also, the batter became too thick for me to stir properly, so I added about a TBSP of water, and things went much better.  You can also warm up your peanut butter for a few second in a microwave, which will make it easier to stir. 

3.  Spread the batter into a 8x8 greased pan.  You can sprinkle the sea salt on now, or when it’s done baking.  If you’re watching your sodium intake, skip the sea salt altogether.

4. Bake at 350 degrees for 20-25 minutes or until the edges start to brown.  (The batter may look a bit underdone, but you don’t want the bars to dry out.)


I’m sure there are several people thinking right now “Umm...these look very...interesting.  If you need me, I’ll be over here with my No Bake Reese's Fudge Bars!”  But hear me out: I’m not a fan of chick peas.  In fact, when I first saw this recipe, the main reason I saved it is because I had several cans of chickpeas and no idea what to do with.  (I got them on sale, and girl can only eat so much hummus.)   Knowing that I don’t like the main ingredient, I was generous when adding peanut butter and vanilla to cover up the dreaded chick pea flavor.  It worked very well!   Also, a 1/2 cup of chick peas has 6 grams of protein and 8% of the iron you need daily.  Do your fudge bars have that?  (Hint: no.)


I’m so excited about how well these bars turned out!  I know I said it before, but I’m going to say it again: if you aren’t vegan or gluten-free, please, please, please don’t be intimidated by this recipe.  You will forget about the chickpeas as soon as you taste the deliciousness (and if you’re stubborn and can’t forget about them, just remember all the protein and iron).  And, if you're vegan or gluten-free, you seriously have no excuses not to make these!

Saturday, July 20, 2013

A Popsicle Palooza


Summer is in full swing and it’s hot outside.  Like most people, I gravitate towards a sweet treat to help me stay cool: ice cream, frozen yogurt, or my childhood favorite, the freezie pop.  All of these are delicious and I want to eat all of them.  Right now.   All of these are full of unhealthy fats, sugar, and chemicals. Darn.

But do not despair!  It’s super easy to make you make your own homemade frozen treats, especially popsicles.   I bought a popsicle mode for $1.50 at a local store.  ONE DOLLAR AND FIFTY CENTS, PEOPLE!  It has room to make 8 popsicles.  Best money I ever spent. You could also use ice cube trays or Dixie cups.

Now that you got your mold, what flavor should you make?  The possibilities are endless.  My favorite standby is Strawberries and Cream: put strawberries (fresh or frozen) in a blender with some milk.  Blend until smooth and add sugar if desired (I don’t).  Pour into your mold and freeze. Bam, in no time, you’re eating popsicles!

Want more ideas?


Bloody Mary Popsicles and Creamy Margarita Popsicles (You wouldn't need alcohol to make them yummy!)

And, if you’re still undecided, here are 18 more flavors.

If you’re a minimalist, adding lemon or mint to water or iced tea and making popsicles out of that is an option.

On a side note, I heard this song in a store last week and now, I can’t stop listening to it.  I’ve been playing it almost constantly for the past 24 hours.  I’m sorry I’m not sorry.  It even drowns out the noisy neighbor kids!


But anyways, back to the popsicles. Make a ton of popsicles, crank the music up, and host a Popsicle Palooza!  They are cheap and easy to make.  They can be relatively healthy too!  Your popularity will skyrocket!  

Photo Credit: Aaron Dyer Photography  He has some of the most gorgeous photos I have ever seen!

Thursday, July 11, 2013

Banana Bread


In celebration of Independence Day, I decided to take last week off of work and visit my parents.  The big city definitely has its perks, but I miss the slow pace of my small hometown.  It's nice to see familiar places and faces once in awhile.


My parent’s house has an extra special meaning to me because my parents, brothers, and I built it when I was in early high school.  We did amazing job, if I do say so myself!  One of the best parts of the house is the kitchen.  My mom put a ton of time and effort into making it a large, friendly space and perfectly fits my family’s needs.  When I'm working in my tiny apartment kitchen, I often wish I would have appreciated all the counter and cabinet space that was available to me when I lived with my parents a few years ago. *sigh*

Anyways, when my mom asked me if I wanted to bake some banana bread, of course I agreed!  I modified a recipe from our church's cookbook and it turned out fabulous!


Banana Bread
1 cup sugar
1/2 cup shortening
2 eggs, separated and beaten separately
3 bananas, mashed
1/2 cup cold water
1 Tbsp vanilla extract
2 1/2 cups flour
1 tsp baking powder
1 tsp baking soda
2 tsp sugar (optional)

1. In a large bowl or a stand mixer, cream together the 1 cup of sugar and shortening.  Mix in the egg yolks, bananas, water, and vanilla.

2. In a medium sized bowl, sift together the flour, baking soda, and baking powder.  Add this to the wet ingredient. Fold in the egg whites.

3. Divide the batter into 2 greased bread pans. Sprinkle the tops of the loaves with sugar and bake at 350 degrees for one hour, or until done.


In a 24 hour period last week, I made 8 loaves of this stuff.  It’s so good!  If you slice it up and pack it in a plastic bag, it’s super easy to bring it with you.  We brought it on a road trip for a snack and then as dessert on a boating picnic. I’m pretty sure this is the perfect travel food because you can make it ahead, it packs easily, and no crumbly mess.  And if you’re not going anywhere, even better, because you can enjoy it fresh out of the oven with butter!  Enjoy!

Sunday, July 7, 2013

Taste of Home's Rhubarb Crisp


Are you still craving rhubarb after mini rhubarb tarts? I know I was! 
I found a great rhubarb crisp recipe from Taste of Home. Doubled this recipe for a 9 x 13 inch pan.

Taste of Home's Rhubarb Crisp
3/4 cup sugar
3 tablespoons cornstarch
3 cups sliced fresh rhubarb or frozen rhubarb, thawed
2 cups sliced peeled apples or sliced strawberries
1 cup quick-cooking or old-fashioned oats
1/2 cup packed brown sugar
1/2 cup butter, melted
1/3 cup all-purpose flour
1 teaspoon ground cinnamon
Vanilla ice cream, optional

1. In a large bowl, combine sugar and cornstarch. Add rhubarb and apples or strawberries; toss to coat. Spoon into an 8-in. square baking dish.

2. In a small bowl, combine the oats, brown sugar, butter, flour and cinnamon until the mixture resembles coarse crumbs. Sprinkle over fruit. Bake at 350° for 45 minutes or until bubbly and fruit is tender. Serve warm with ice cream if desired.


Taste of Home Editor's Note: If using frozen rhubarb, measure rhubarb while still frozen, then thaw completely. Drain in a colander, but do not press liquid out.


Thursday, June 27, 2013

Mini Rhubarb Tarts


Hello everyone!  I’m sorry for not posting anything on here for a while.  I’ve started working a second job, so my free time is limited.  Also, summer’s heat is now in full swing and my small apartment is always super warm.  So, turning on the stove or oven is the last thing I want to do. But, no more excuses!
 
There are few shopping experiences that can compare to a local farmer’s market: outdoors with the wind in your hair and the sun shining down (or sleet coming down, whatever it happens to be!), that's how I like to buy dinner.  Call me sappy if you want, but there’s something about a community coming together to buy and sell fresh food that warms my heart.


Anyways, I stopped at my local farmer’s market the other day.  After weeks and weeks of rainy, dreary weather, it was one of the first sunny days we’ve had, so it was extra special.  Because it’s so early in the growing season, there wasn’t much produce for sale, but there was one thing that almost every vendor had: rhubarb!  I purchased a huge bunch for a shockingly low price and was ready for a fun afternoon in the kitchen.


A certain somebody was very curious!

Once back at home, I had a hard time deciding what to make with my rhubarb.  Should I play it safe and make a crisp?  Nah.  A tart sounds fun, but I don’t have a fluted tart pan, and the crinkly edging is necessary to make a tart fun.  Mini things are fun too.  A mini tart without crinkly edging would be acceptable.


And that, good people of the internet, is how my mini rhubarb tarts came to be a reality.  *Cue triumphant music*  


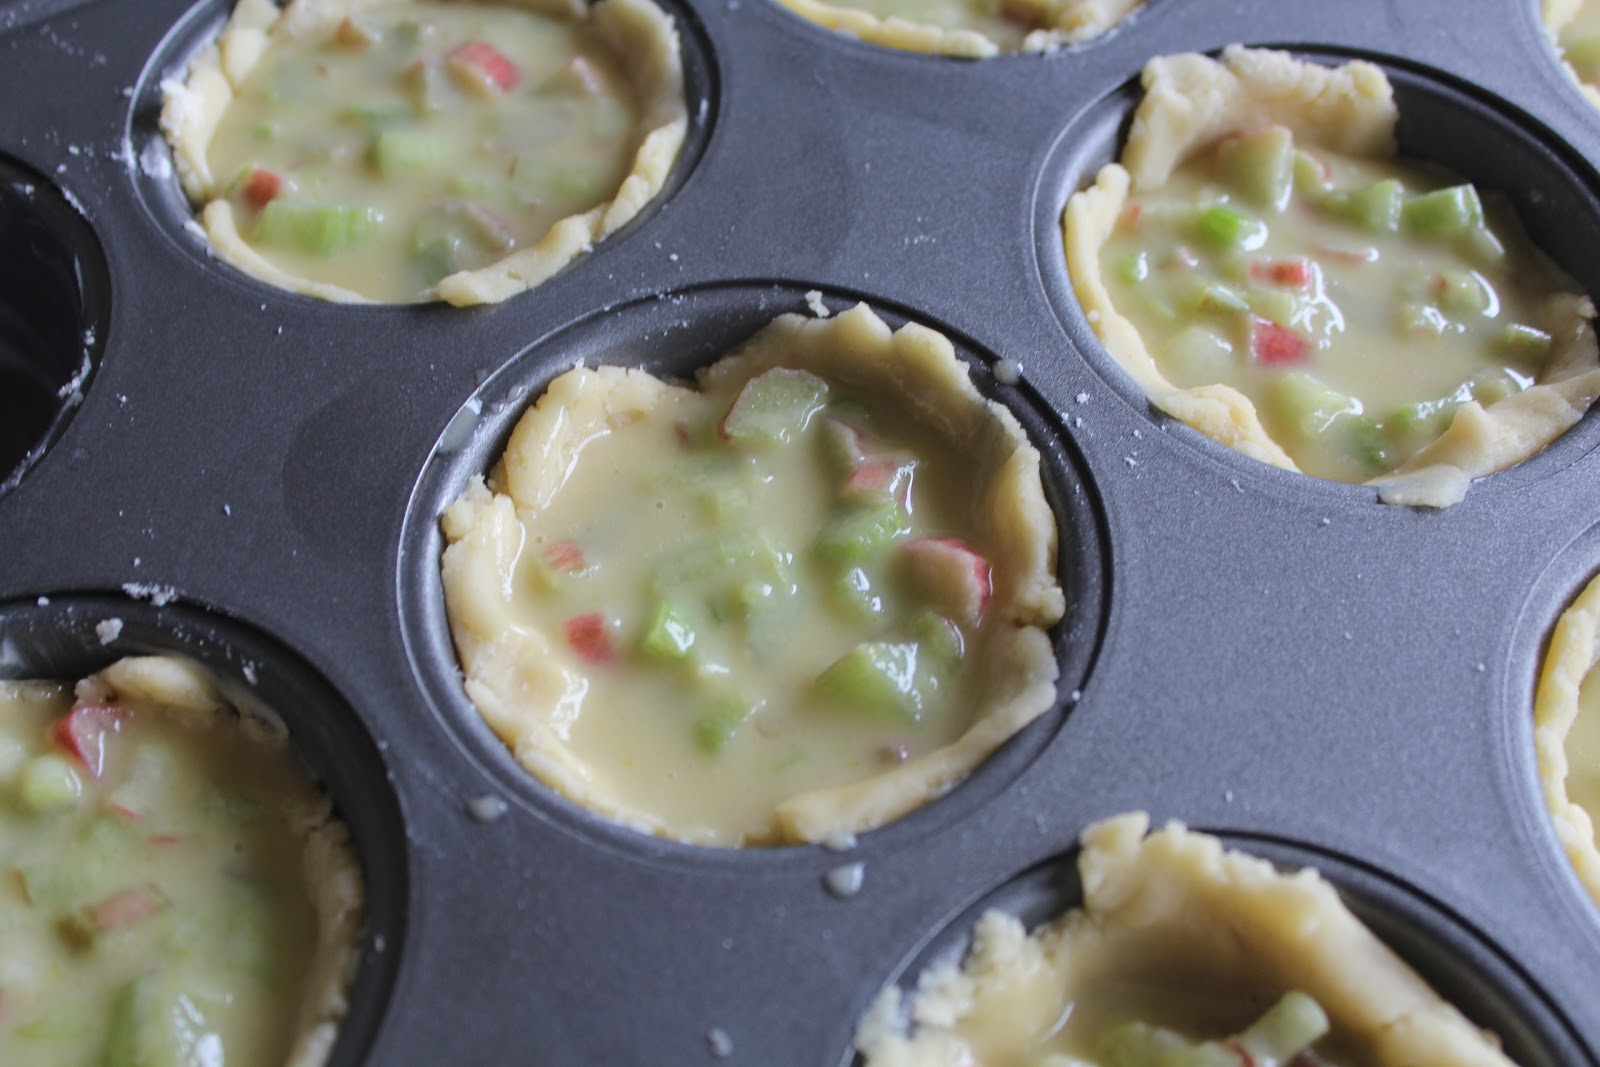
The crust of these tarts is Smitten Kitchen’s great unshrinkable sweet tart shell and the filling is my own original creation.  This recipe will make 12 cupcake sized tarts.  Here’s the printable recipe.


Mini Rhubarb Tarts

For the Crust:
1 1/2 cups all-purpose flour
1/2 cup confectioner’s sugar
1/4 teaspoon salt
1 stick of very cold unsalted butter, cut into small pieces
1 large egg


For the Filling
2 cups rhubarb
1/2 cup sugar
1/2 cup flour
1 egg
1. Let's start on the crust.  Put the flour, sugar and salt into a food processor or a plain bowl and blend them together.  Take the cold butter and chop it into small chunks.  Place the butter into your food processor or bowl and blend it in.  If, like me, you are using a plain bowl you can use a fork and your fingers to blend the butter into the dry ingredients.  You want the butter to be in oatmeal sized chunks.  
2. Take your egg and it to the butter and flour mixture.  Stir and knead the dough until the egg in mixed in well.  
3. Grease your cupcake/mini tart pans very well.  You don't want your tart to stick or break as you pull them out of the pan.  Take your dough and divide it into twelve balls, one ball per tart.  Press one ball into the sides of each cup to form the crust.  Place you crusts into the freezer for at least a half hour.  
4. Now we can work on the filling.  Finely chop about two cup of rhubarb. Add it into a medium bowl along with the sugar, flour, egg and mix it all together.  This is probably a good time to preheat your oven to 325 degrees. (The lower temp will help the filling cook completely without letting the crusts burn.)
5. Once you crusts have been chilled for at least 30 minutes, evenly distribute the filling into your twelve crusts.  You want each crust to be about 90% full.
6. Bake your tarts at 325 degree for 30 minute or until the crusts are golden brown and the filling has firmed up a bit.  Let the tarts cool and then carefully remove them from the pan.

These little tarts are so cute!  I think they would be a perfect addition to a dessert buffet or with some iced or hot tea in the afternoon.


Friday, June 7, 2013

Veggie and Pesto Pasta Salad


I love the freedom of mealtime in the summer: grilling on the deck, ice cream at the beach, iced tea on a lazy Sunday afternoon.  Food always seems to taste the best when everyone is laid back and surrounded by the ones they love, and summer seems to give us the most opportunities for these meals.  

One dish that’s a staple to any summer get-together is the pasta salad.  I like my pasta salads swimming in mayonnaise, but not everyone likes mayo ( I have no patience for these people.) and it’s a pretty unhealthy choice.  Italian dressing is another option, but by the time August rolls around, maybe you want something new?  I’ve got just the thing: Pesto!    
    
I’ve only had pesto a few times and it was always from a seasoning packet.  To me, it tasted like buttery noodles with some seasoning salt.  Plus, I would always get the little green pieces stuck in my teeth. Annoying!  When I tried making my own homemade pesto, I was shocked at how much flavor it had.  At least it worth getting pesto stuck in my teeth!


Life is better with fun shaped pasta.


This recipe was inspired by Joy the Baker.


Veggie and Pesto Pasta Salad
4 cups of spinach, packed loosely
2/3 cup of extra virgin olive oil
2 spoonfuls of minced garlic (two garlic cloves)
3 teaspoons of lemon juice
1/2 cup of grated parmesan cheese
1 pound of uncooked pasta (about 8 servings)
A variety of vegetables


1. Bring a pot of water to a roiling boil and drop in your pasta.  Stir occasionally until the pasta is cooked.  Drain, then let the pasta cool by running cold water over it.

2. While your pasta is cooking and cooling, coarsely chop you spinach and put it in a blender or food processor with the EVOO, garlic, lemon juice and parmesan cheese.  Blend until the spinach is almost liquified.  This is your pesto sauce. 

3. Chop your veggies into bite sized pieces.  Use whatever veggie make you happy.  I used green bell peppers, tomatoes, onion, and green olives.  Others that would be good: broccoli, cauliflower, cucumber, black olives, celery, mushrooms, carrots, even kernels of corn.  So, yep, you’ve got lots of options.

4. In a large bowl, mix together the pasta, noodles, veggies, and add salt and pepper to taste.


So, now I’m confused: is all homemade pesto this good or am I just an excellent pesto cook?Anyways, this dish seems to keep very well in the fridge overnight ( I was worried about the olive oil separating), so it would be a wonderful item to make ahead for a backyard BBQ or a potluck. After all, garlic breath is best when it’s shared!  Enjoy!

Tuesday, June 4, 2013

Blueberry Crumble Coffee Cake


I love eating fruits and veggies and when it comes to dessert, I’m no different.  Rhubarb crisp, carrot cake, or pumpkin bars; they’re a nice change from chocolate. (Don’t get me wrong though, I’m a chocoholic from waaay back.)

Blueberries are one of my favorite fruits to cook with... and of course eat too!  And now, after my trip to Maine, I’m going crazy for them.  Lucky for me, I found this recipe on Sweet Anna’s, but I wanted to make it a bit healthier.   

Also, this is the first recipe you can print!  I hope you’re all impressed by my technological skills!

Anyways, let’s get started:

Blueberry Crumble Coffee Cake
For the cake:
1 1/2 cups all-purpose flour
1 1/2 cups oat flour*
4 teaspoons baking powder
1/2 teaspoon salt
1 teaspoon cinnamon
1 1/2 cup sugar
1/2 cup butter, softened
2 eggs
2 teaspoon vanilla extract
1 cup milk (any kind, I used soymilk)
4-5 cups fresh blueberries (or frozen, do not thaw)

For the crumble topping:
1 cup brown sugar
1 cup all-purpose flour
1 teaspoon cinnamon
1 teaspoon nutmeg
1/2 cup butter, softened
1-2 teaspoons of sugar, optional

Preheat the oven to 375ºF. Grease a 9x13 and set aside.
Let’s start on the cake:
1. Stir together the two types of flour, baking powder, salt and cinnamon in a medium bowl.
2. In a large bowl (or a stand mixer, if you have one) cream together the sugar and butter. Then add the eggs and vanilla. Stir together.
3. Add in the flour mixture and milk alternately (flour, milk, flour, milk, flour) to sugar mixture.  
4. Then, gently fold in your blueberries.  The batter will be rather thick, so try not to mash the berries.
5. Evenly spread the cake batter into your greased pan.  
Now for the crumble topping:
6. In the bowl that you had the flour mixture in, add the brown sugar, flour, cinnamon, nutmeg and butter.  Mix them together.  If the topping doesn’t seem crumbly enough, add a bit more sugar to dry it out.

7. Crumble this on top of your cake batter.

8. Bake for 45-55 minutes, or until golden brown.  Let cool and serve.

*You can make your own oat flour by grinding up oatmeal in food processor, blender, coffee grinder, or spice grinder.  However, make sure you’re measuring 1 1/2 cups of the oat flour and not 1 1/2 cups of plain oatmeal, because you won’t be adding enough flour.  If you want more information about oat flour, here’s a great article.


This coffee cake is great because it’s not too light or too heavy.  It’s perfect for a summertime dessert or for brunch.  Enjoy!